

WHAT IS BOOSTING?
Boosting is the activity built around car theft contracts. From the phone app you can select an offer, enter the search area, locate the target and bring it to the final drop-off.
It is not a standard race: here risk management, speed and vehicle condition matter. Every completed contract feeds your Underground Career and raises your Boost Level.
PICK THE RIGHT JOB
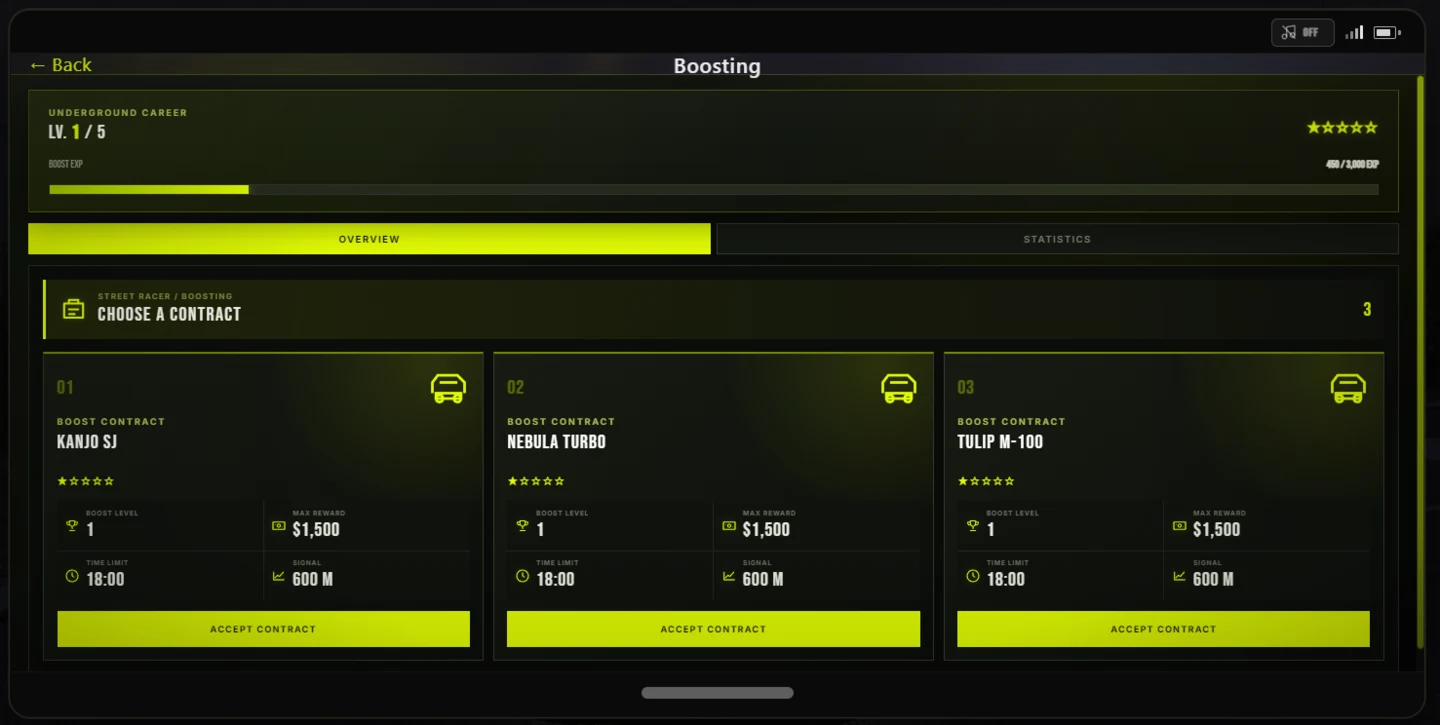
The Overview tab shows your progression at the top and the available offers below. Each contract shows the target model, required level, time limit, max reward and search signal range.
Completing contracts grants Boost EXP. Higher levels also mean more heat, tougher wanted levels and more valuable vehicles.
FROM SIGNAL TO DROP-OFF
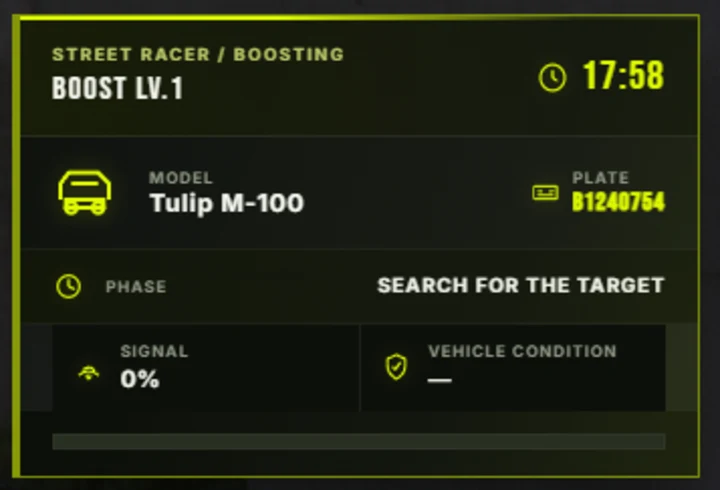
Once you accept a contract, the flow is clear: search the target, get close, start the takeover, lose the cops and finally deliver the vehicle. The contract HUD always tells you which phase you are in.
SEARCH THE TARGET
Reach the area and use the signal to narrow the search.
TARGET NEARBY
When the signal becomes strong, stop near the correct vehicle.
TAKEOVER
Complete the security sequence while staying in control.
ESCAPE / LOSE THE COPS
Drive the car out, leave the hot zone and clear your wanted level.
DELIVERY
Reach the drop-off and keep the vehicle still to finish the job.
READ YOUR PERFORMANCE
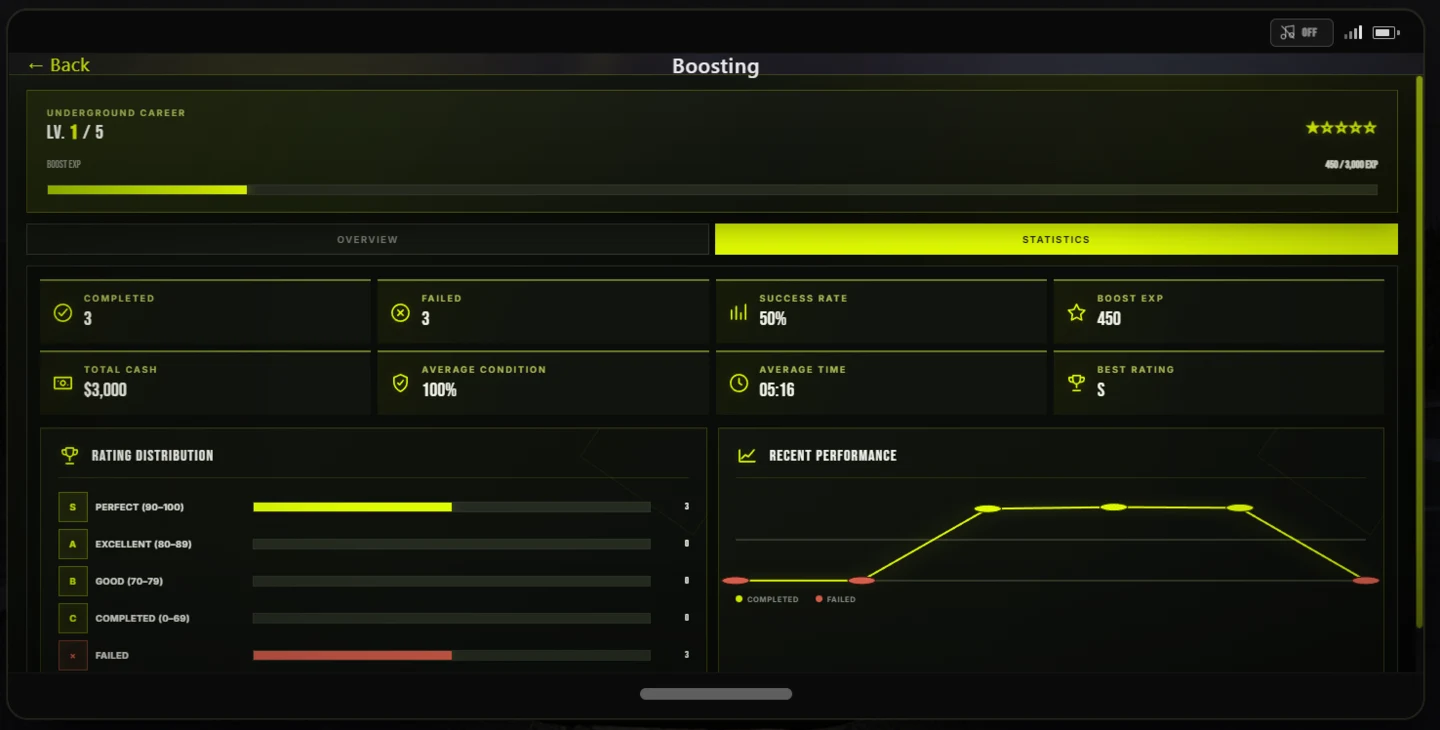
The Statistics tab sums up everything you have done so far: completed and failed contracts, success rate, total Boost EXP, earned cash, average time, average condition and your best rating.
At the bottom you also get a rating distribution and a recent performance chart, useful to see whether you are improving or forcing harder jobs too early.
ARRIVING IS NOT ENOUGH
Your final result depends on how you deliver the car. In general, the system rewards vehicle condition, time left and your ability to finish cleanly.
CONDITION
The cleaner the car arrives, the better the result.
TIME
Finishing with margin is always better than scraping the limit.
RATING
S, A, B and C summarize the quality of the job and affect rewards.
BEFORE YOU ACCEPT, KNOW THIS
- If time runs out, the target is destroyed or you get arrested, the contract fails.
- A damaged car or a messy delivery lowers the quality of the result and the reward.
- Contracts are not all the same: level and wanted heat change the tone of the job.
- If you want to practice, use the early levels to learn the loop before pushing further.